Problem
How do I create a Planned Maintenance Schedule in QFM Web from scratch?
Resolution
To answer this question we will run through a worked example.
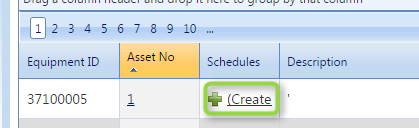
- The first thing we want to do is find the asset which we want to create a schedule for, do this via the ‘Find Assets’ screen.
- The easiest way of a starting the wizard is via the ‘Schedule’ button on the ‘Find Asset’ search results, alternatively you can launch it via the main screen of the asset via the schedules tab.

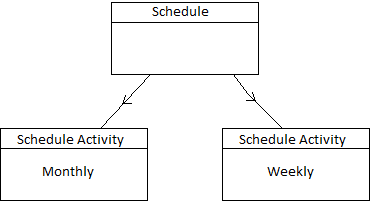
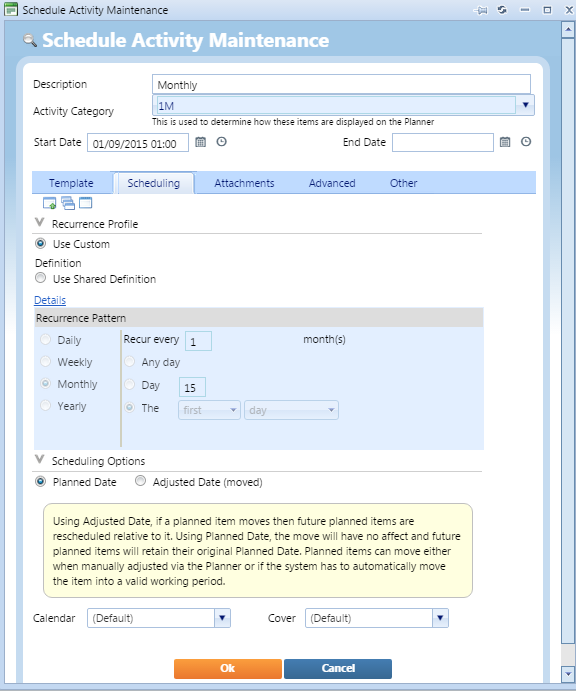
- Now you will be presented with a blank schedule. A schedule comes in two parts. The schedule and then the schedule activity, you can have more than one schedule activity in a schedule. The reason we have more than one is because on schedule activity may be weekly maintenance while the other monthly etc.

- We will set up the Schedule as follows:
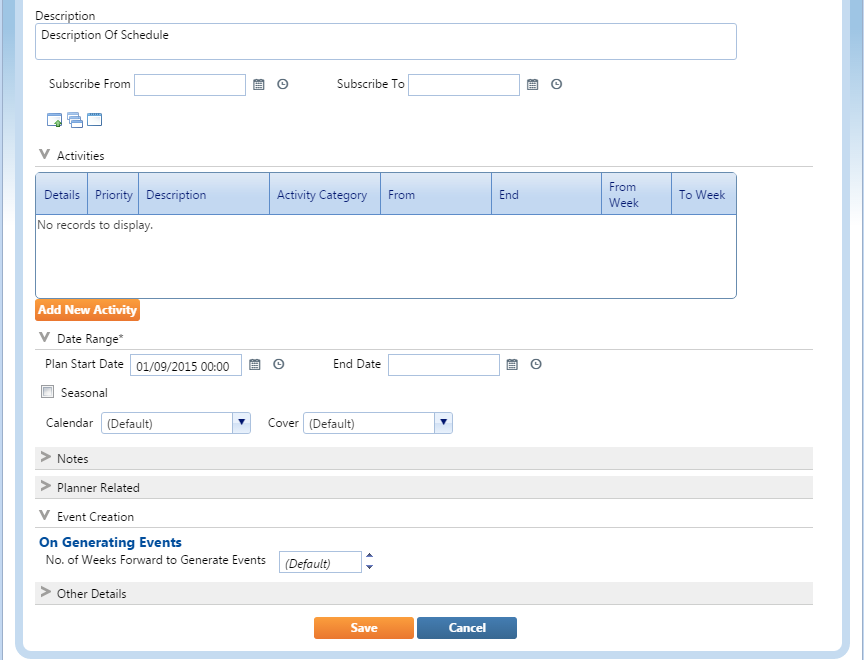
a. Description – A short description for what the schedule is.
b. Subscribe From – Leave blank
c. Activities – Skip this section for now.
d. Plan Start Date – We have used ‘01/09/2015 at 00:00’ set this value to be when you want the schedule commence, this has to be before the Activity start date.
e. Leave the rest of the items on here as the default.

- Now we have created the Schedule we will now create the scheduled activity, to start this click ‘Add Activity’:
a. Description – A short description for what the activity is e.g. Monthly Service
b. Activity Category – This is purely aesthetic, it will control which colour scheme is used for the schedule graphically, we picked the monthly colour scheme.
c. Start Date – This is important as it will dictate when the first scheduled activity will start, this date has to be after the schedule start date so we set ours to start 1 hour later.
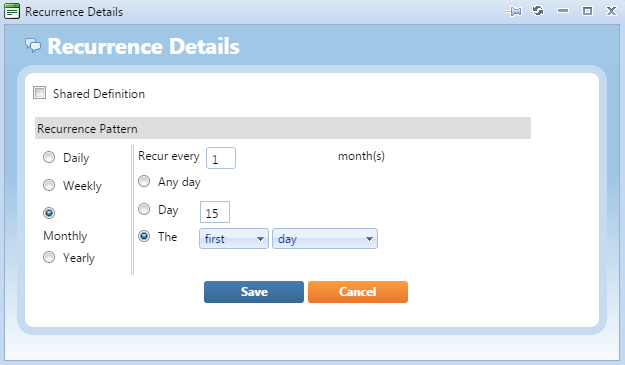
d. Reoccurrence Profile – This is also important as it will dictate how often the activity will create an event e.g. Yearly, Monthly, Weekly. To add a profile click the green plus and you will be given a simple pop-up asking how often to create events, we set ours up as a monthly schedule to generate at the start of every month.

e. Leave everything else on this tab blank.

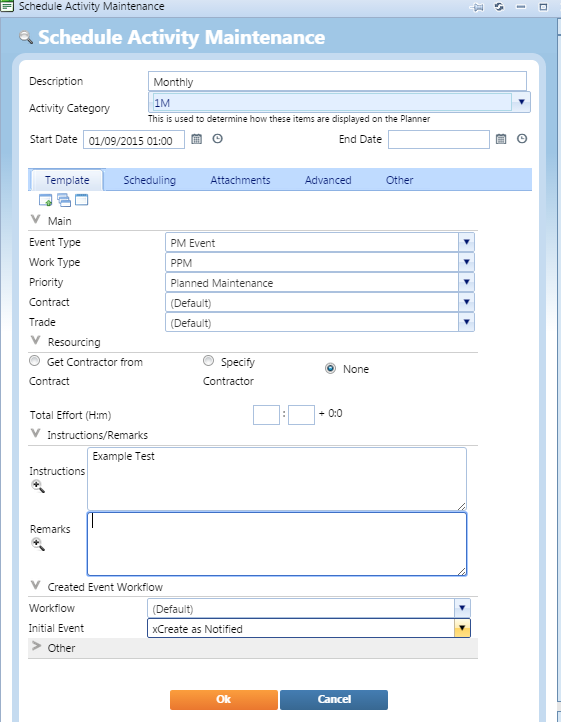
f. Now select the ‘Template’ tab on the Activity, this will bring up the tab where you should enter in the details you want to see on then events that get generated from this activity.

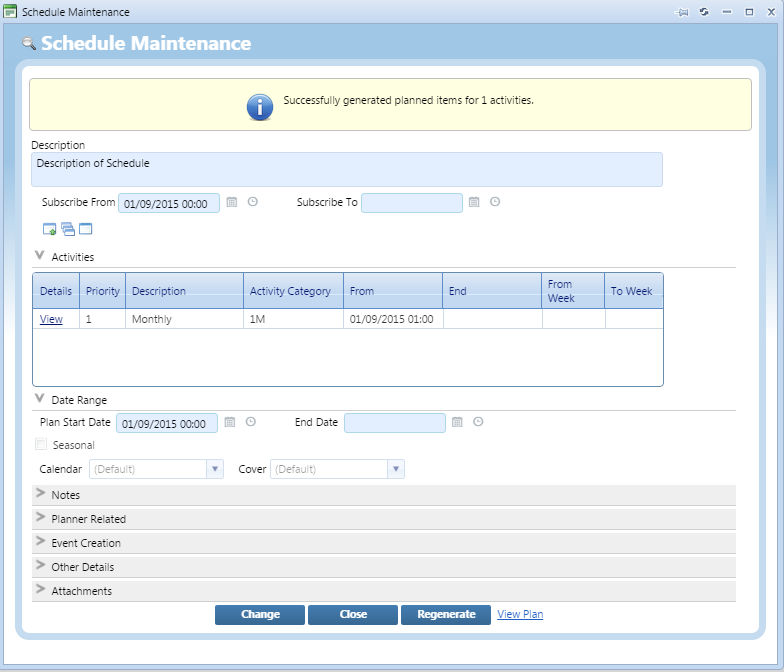
g. Once you are done here click ‘Save’. - Now we are ready to save the schedule so click ‘Save’ on the schedule screen too. You will be presented with a pop-up, just select ‘Ok’ on this.
- Now you should have received a message at the top of the schedule to say that you have created your schedule correctly.

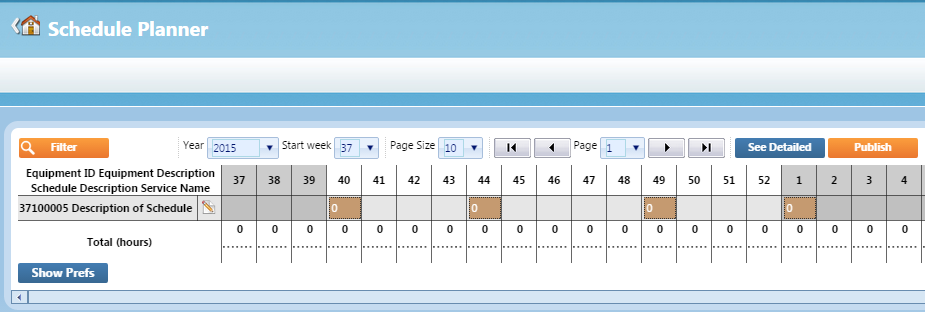
- Now if you click on the ‘View Plan’ you will be presented with the graphical representation of your schedule.