Here, we show how to create a List Report with customised filters then schedule the report to be generated automatically.
- Go to the Report Centre (System > Report Centre) and select the List Report required.
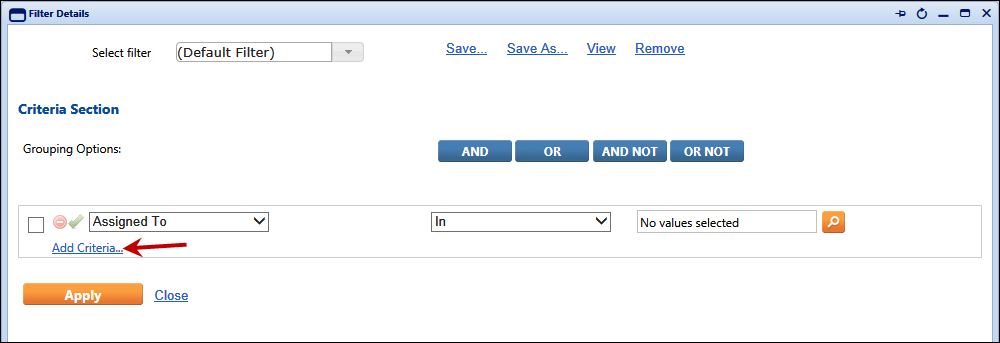
- Select Filters
 then in the Filter Details window add your criteria as appropriate.

- Select Add Criteria… then make your criteria selection from the first drop down list (left to right). Once you have selected a value, select a condition from the second drop down list, (these are context sensitive and change according to the criteria selected). Select a condition value or set of values in the third (lookup) field.
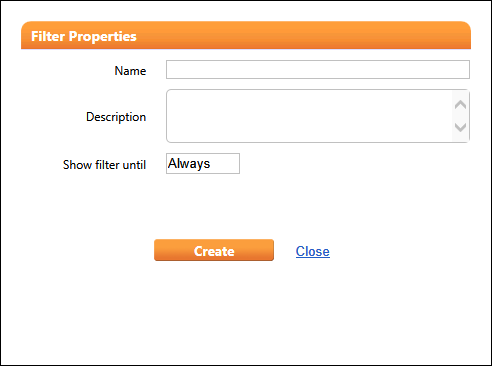
You may enter any number of criteria values; simply select Add Criteria… to display another row. Once you have selected all your criteria, you can add Grouping Options and apply these by ticking the box (left end of each criteria row) for each criteria you wish to include. - Once all criteria are selected you can save the selections to the Filter list to be used again. Simply select Save As… then in the Filter Properties window add a Name and Description. You can also leave the Filter as always available (Show filter until) or specify a date after which the Filter will become unavailable.

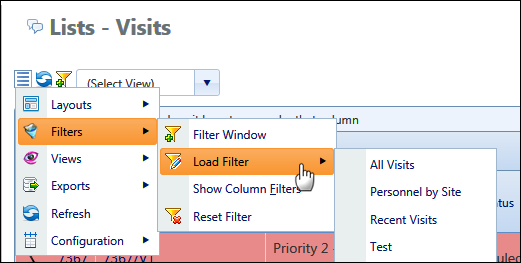
Select Create. - The Filter is now saved and can be selected from the Filters menu.

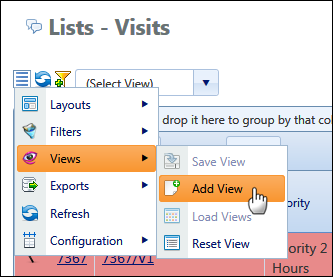
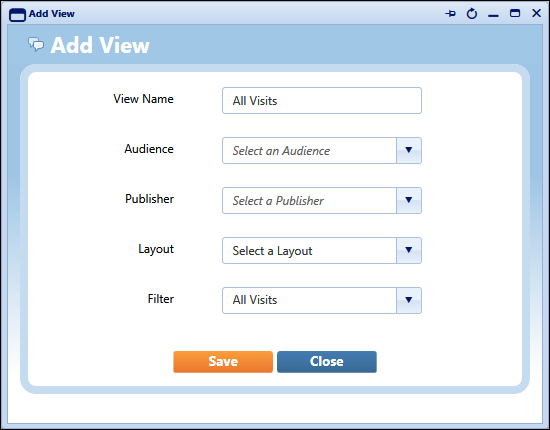
- Next, create a new View. From the Views menu select Add View.

- Add the details in the Add View window, ensuring to add a View Name and select the Filter you created.

Select Save. - Next, with the View and Filter loaded, select Save Layout from the Layouts menu.

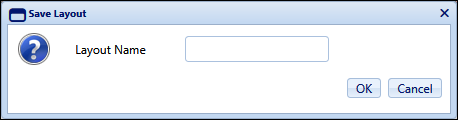
- Save a Layout Name then select OK.

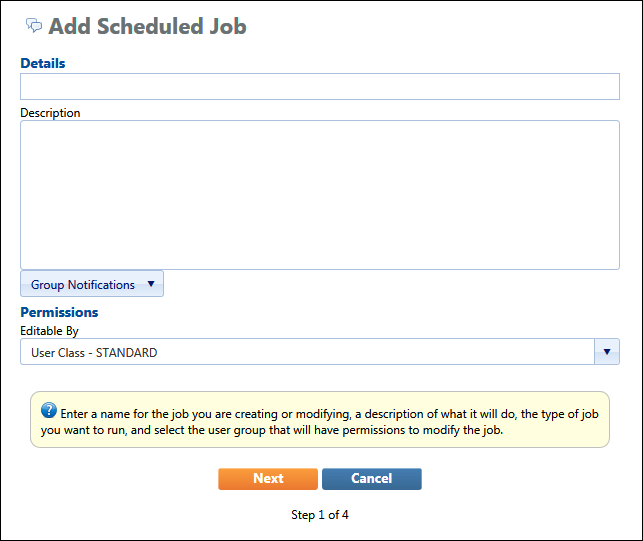
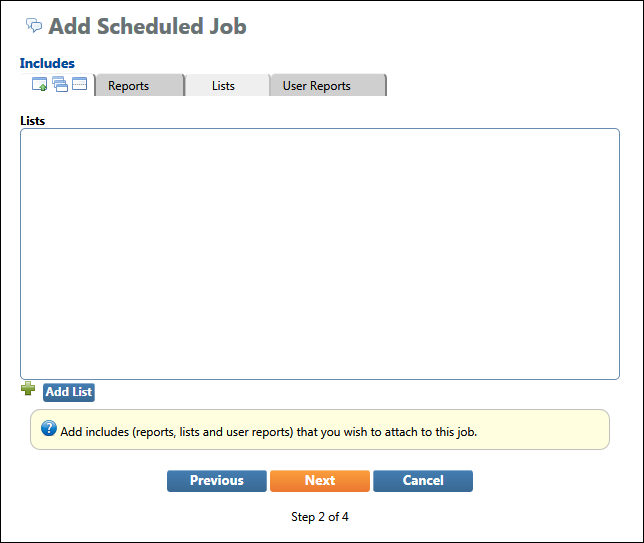
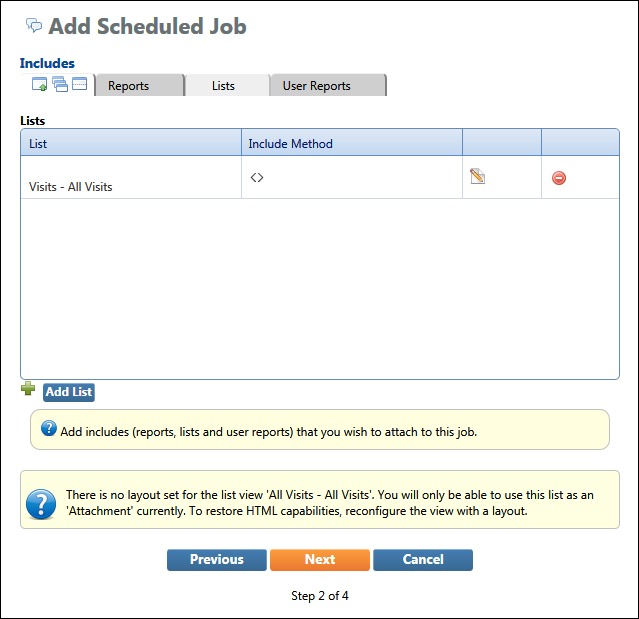
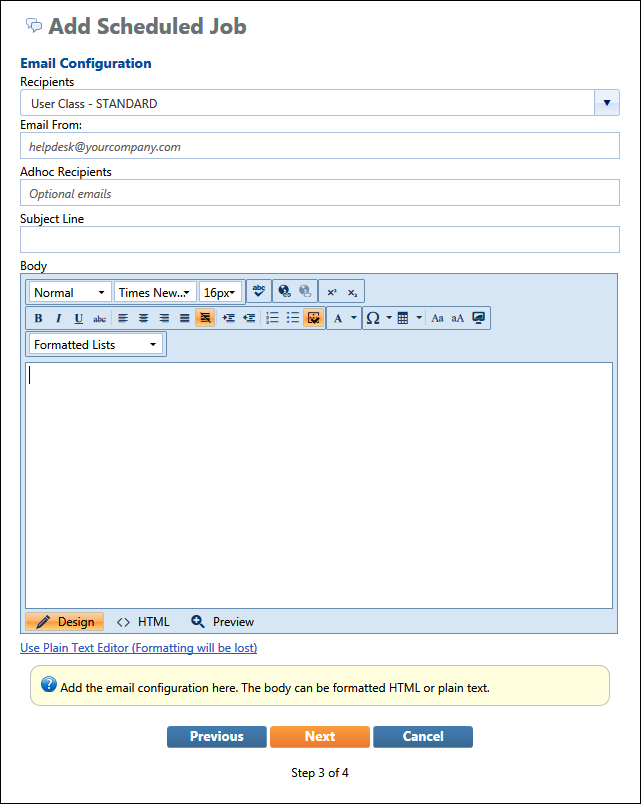
- To set up the automated report production, go to Add Schedule from Scheduled Jobs in the Report Centre.

- Complete the schedule details on the screens shown below.